Ten SEO tips for 2021
15/04/2021
Google Play Development Account.
16/04/2021
A step-by-step guide on how to create your Apple Developer account and enrol in the Apple Developer Program for your iOS app(s).
The Apple Developer Program gives you the ability to make your app available on the App Store for iOS users. However, due to Apple’s guidelines and policies, you must set up your developer account for your app to be published.
The good news is because the app will exist under your account, you will have more control over it, and it will maintain your business’ branding on the App Store listing.
Note: If your app is for internal use only, you’ll need to enrol in an Apple Enterprise Developer Account, and you’ll need to upgrade to our Business level plan.
For more information on our Business level plan, we encourage you to reach out to us at:
Now, let’s get on to the steps to create an account.
How to create an Apple Developer Account
Before we begin, we should note that each app will need to be housed in its developer account if you have multiple apps in our system.
Step 1: Go to Apple’s developer website and create an Apple ID; if you do not already have one, set up two-factor authentication for your account.
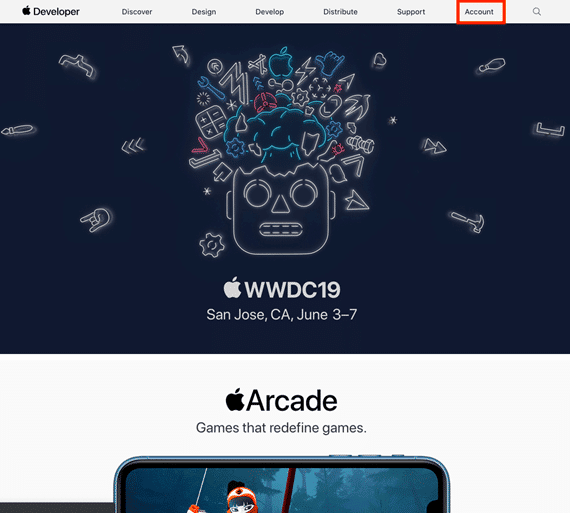
Go to https://developer.apple.com/
Then click on “Account” at the top of the page.
If you don’t already have an Apple ID, you can create one by clicking on the “Create yours now” link next to “Don’t have an Apple ID?”
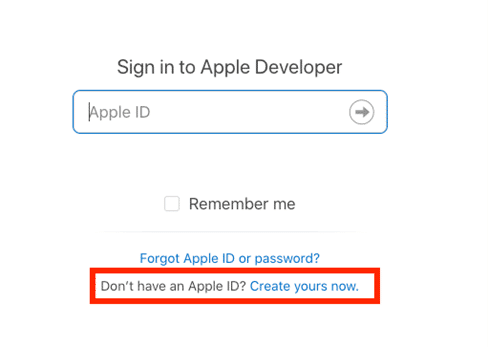
This will take you through creating an Apple ID that will allow you to log in to your Apple developer account once created. If you already have an Apple ID created that you’d like to use, go ahead and log in with that Apple ID.
Once you have created your Apple ID, you will also need to enable two-factor authentication on it, a requirement by Apple for all Apple IDs. It’s easiest if you have an Apple device that you can use, but if you don’t, reach out to Apple, and they’ll be able to help you set that up. You can follow the steps in this article to set up two-factor authentication.
Doing so now will help streamline the rest of the enrolment process.
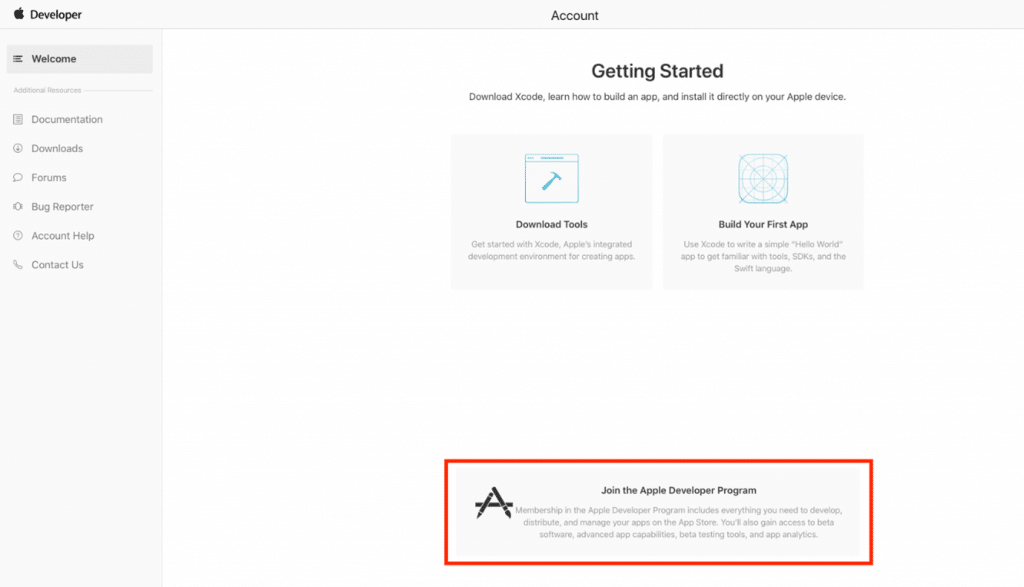
Step 2: Click “Join the Apple Developer Program”
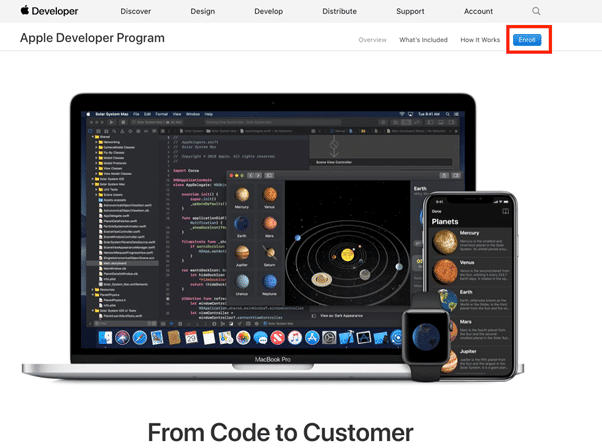
Once you’ve logged in or created a new Apple ID and logged in with it at https://developer.apple.com/, you’ll see a link titled “Join the Apple Developer Program”.
This will take you to a page where Apple tells you all about the developer program. You can read through this if you want but click on the “Enroll” button once you’re ready.
This will take you to a page telling you what the two different account types are and what you need for each one. These are the two different types of Apple developer accounts:
This will take you to a page where Apple tells you all about the developer program. You can read through this if you want, but once you’re ready click on the “Enroll” button.
This will take you to a page telling you what the two different account types are and what you need for each one. These are the two different types of Apple developer accounts:
Individual:
An individual account only allows for a single primary login to be created to the iOS Developer Account. The developer name that will be made public (on the App Store) will be your First and Last name. Sign up for an individual account only if your app is branded to you as an individual.
Company/Organization:
A company/organisation account allows multiple user logins to be created and managed with varying permissions capabilities for each login. In addition, the developer name that will be made public will be your company or organisation’s name.
Enrolling in the correct account or entity type is vitally important to get your app submitted and approved by Apple. Not sure which account type to register as? It all boils down to your app’s content and what its branding is set to.
Using Tony Stark of the Avengers as an example, let’s say he built an app about himself called “Tony Stark’s App”. Not as creative as his Iron Man suits, but it does the job, and everything in that app is related to him as a person. Then he could enrol as an individual. But let’s say he made an app for his company Stark Enterprises or a charitable organisation that he created. He’d have to enrol as a Company/Organization for that app since it’s explicitly created for his company or organisation.
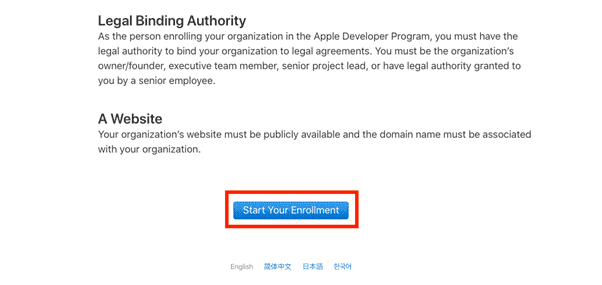
Enrolling as a Company/Organization will require providing a Dun and Bradstreet number, which we will go over later on.
Once you have gone over this information, click “Start your enrollment”.
Step 3: Confirm that your email address, name, and Country location are correct, then select the type of account that you’re enrolling as
Next, you’ll be asked to verify your email address, name, and country location, then select the account (or entity type) that you’re going to enrol as.
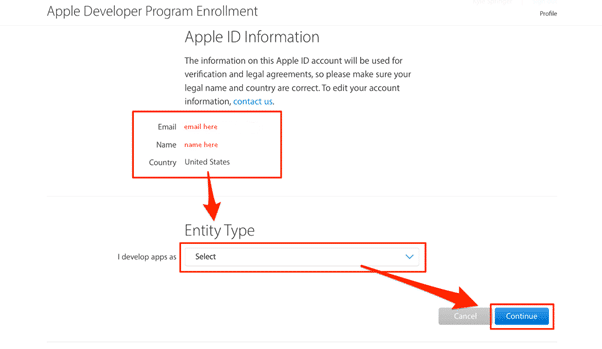
Remember, keep in mind what your app is designed for. If your app was built and branded for you, you could enrol as an individual. However, if your app was created and branded to your company or organisation, you will need to register as a Company/Organization. To do so, you will need to provide a Dun and Bradstreet (DUNS) number. If you’re uncertain whether your business has a DUNS number, you can check to see here.
If you don’t have a DUNS number yet, it is free to get one, and you can obtain one on this page. The process of securing one typically takes a couple of weeks. If you need help with obtaining a DUNS number, you can follow the steps found here. That page also has instructions for organisations outside of the United States.
Once you have a DUNS number, you can provide it to Apple during the Apple enrollment process.
Step 4: Enter your contact information and read through the agreement at the bottom of the page.
On the next screen, you’ll be asked to fill out the contact information for your account:
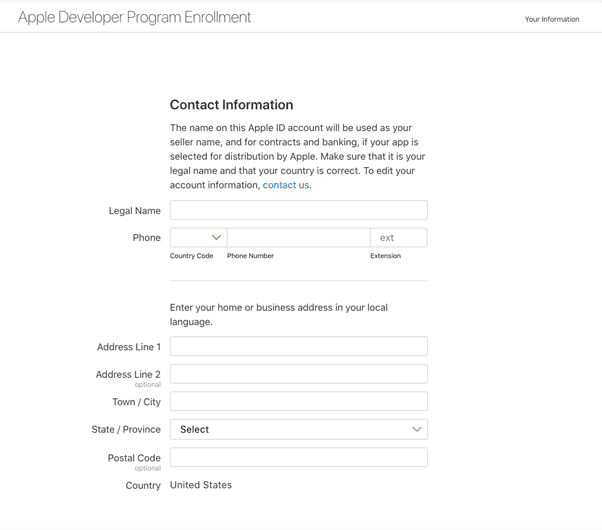
After that, you’ll be asked to read through the Apple developer account agreement. Read through this, then check the checkbox confirming that you’ve read it, and click Continue.

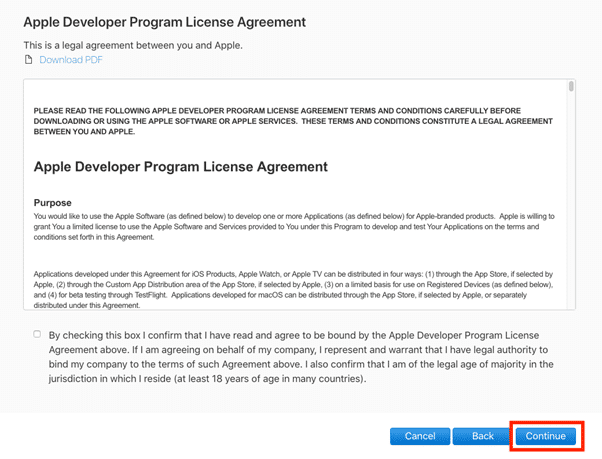
Step 5: Verify your account information, then click “Continue”.
Once you have read through Apple’s Developer Program License Agreement and clicked continue, you’ll be asked to verify your account information. Once you’ve done this, click Continue.
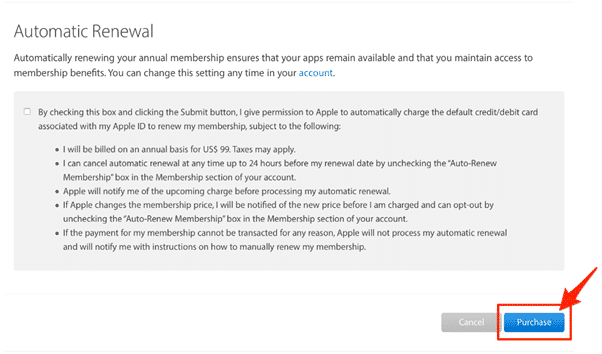
Step 6: Decide if you want Automatic Renewal.
Next, you’ll be brought to a screen telling you how much the enrollment fee will cost and its duration. You’ll also have the option to enable automatic renewal, which will help you if you’d like to not worry about renewing your plan each year. Go ahead and check the box if you’d like to enable this (you can always disable it later), then click Purchase to move on to paying for your developer account.
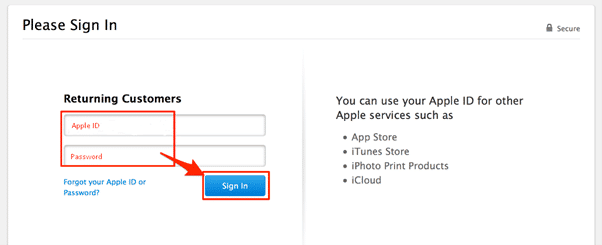
Step 7: On the next page, sign in with your Apple ID.
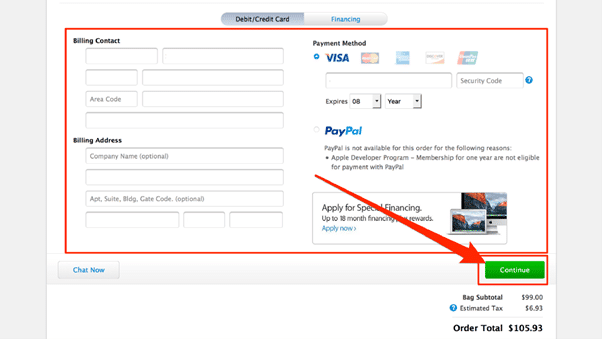
Step 8: Fill in your billing information, then click Continue to finalise your payment.
Step 9: Fill out the rest of the information on the proceeding screens
Within 24 hours, Apple should send you an email confirming that your Apple Developer Account has been created successfully.
Step 10: Upgrade your plan in our system
After you have created your Apple developer account and have completed your enrollment in the program, go back to our system to upgrade your app to one of our paid plans. You can do so by clicking on the button next to your app’s name in the top right-hand corner of the app dashboard.
Step 11: Enter your app’s details in the Publishing Information section of the app dashboard.
Now that you have upgraded to one of our paid plans and have set up your Apple developer account in the App Dashboard go to Settings -> Publishing Info and fill out the Apple-specific information for your app.
IMPORTANT NOTE:
To publish on your behalf to your iTunes account, we will need full access to your developer account. As such, we require YOUR username and password for your developer account. Unfortunately, at this time, there is not a separate user permission setting that will allow us to publish on your behalf fully. Thus, please be sure to send us your credentials once you have fully set up your account.
You can learn more about what information is needed on the Publishing Information page here.
IMPORTANT NOTE:
Once you have sent your app off to our publishing team to submit to Apple and Google, you’ll need to reach out to us at [email protected] so that we can set up a time for our publishing team to call and obtain the two-factor authentication code that’s generated when we try to access your account. This is due to the requirement by Apple that all Apple developer accounts need to have two-factor authentication enabled in them. Once we have access to your account, we’ll be able to submit the app for you.
What are some tips you should know about?
Pro Tip: You may be eligible to waive Apple’s enrollment fee
Nonprofit organisations, accredited educational institutions, and government entities based in the United States that will distribute only free apps on the App Store can request to have their annual membership fee waived. Click here for more information and to see if you qualify.
Note: To be eligible, you must provide Apple with a DUNS number.
Pro Tip: You can have multiple apps under your account
You can have multiple apps under your account as long as they:
- Apply directly to your business
- They are not the same in nature or intent
- Adhere to Apple’s terms and guidelines.