Google My Business is now known as Google Business Profile
29/12/2021
Quick SEO Wins For Your Brand New Website
21/01/2022Do you want to learn how to create a new post in WordPress? And learn about all the WordPress post features you see on your screen?
Of course, you do!
You might be thinking that adding a post in WordPress is as easy and straightforward, but many beginners find the interface overwhelming.
And even the more savvy users get surprised to find hidden gems on the post edit screen.
We’re going to be walking you through every feature on the add new post screen, and then show how those work in order for great content. We’ll go step by step!

To help you navigate our guide, we’ve divided it into three sections:
We are confident that this is the best way to get your information.
- Creating a new post in WordPress using the default editor(Recommended)
- Creating a new post in WordPress using the classic editor
- Bonus tip for creating better blogs
Let’s get started.
Creating a New Post in WordPress Using The Default Editor
WordPress has introduced a new, more modern block-based editor in December of 2018 known as Gutenberg.
Its clean and simple interface may lead you to believe that this is an easy way for beginners or those without much experience creating websites but don’t let your guard down because there are still some hidden gems within its features.
We’ll explain all of them and help you unlock their true potential.
Adding Title and Content Blocks
The WordPress block editor provides a clean interface for writing your posts. The top of this tool allows you to enter the title of what will be placed in each individual box on-screen, making it easy and accessible at all times!
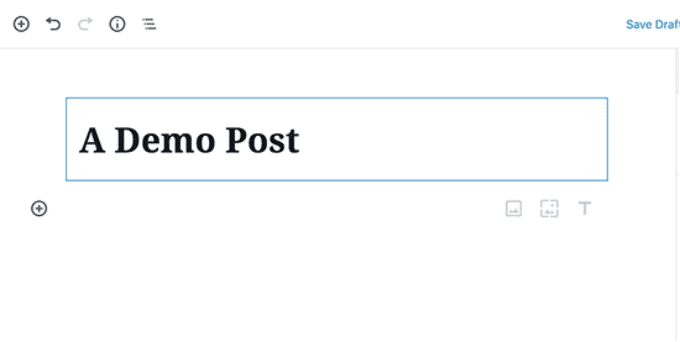
To add content, simply click the block you want to use and then type your input. There are many different blocks on this page that make adding text a breeze!
To select a block, you can use either your mouse or keyboard shortcut. If you want to click on the button with one tap of a button then enter /search into the Google search bar and find what’s needed!
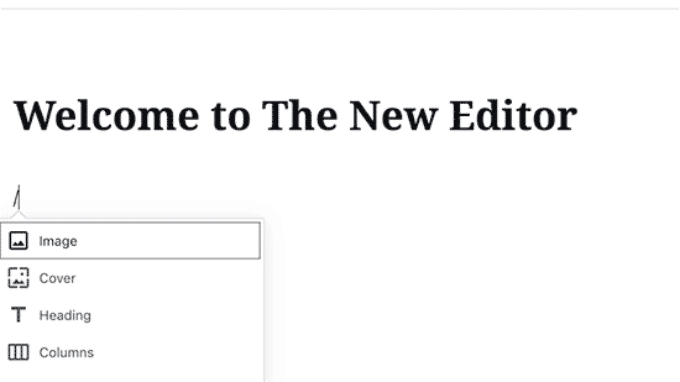
WordPress has a wide range of built-in content blocks for all the common types and styles you need. These include paragraphs, columns – even images! You can create beautiful layouts with ease using these tools at your disposal which is why it’s so popular among bloggers today.
Some WordPress plugins may also add their own blocks to add other features like contact forms, SEO, etc (more on this later in the article).
Adding Images, Videos, & Other Media
To make your post more interesting, you can add images to it. Simply select the Add Image Block and then upload or choose an image from galleries on our site!
The ‘Media & Text’ block is great for posting images with text wrapped around them. You can use it to create a blog post or article, but it’s best when used in combination with other blocks like the ‘Block Quote’ and dividers so that readers know where they should stop reading!
The WordPress editor comes with a simple yet effective gallery block that you can use for displaying images in rows and columns with a grid layout.
Simply add the Gallery block and then upload or select the images from your WordPress media library.
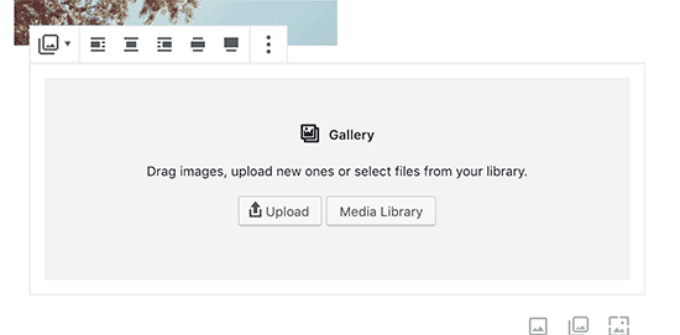
We recommend using one of the WordPress gallery plugins if you want more advanced features like albums and sorting images.
Want an easy way to add videos to your content? No sweat.
Embeds! The default WordPress editor comes with embed blocks for all popular providers.
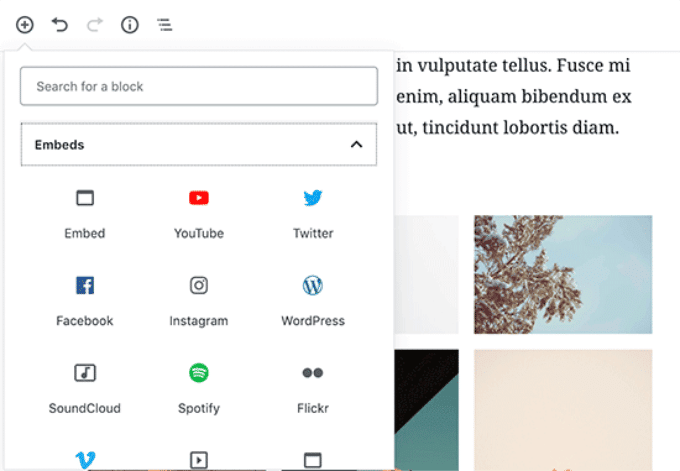
You can also just copy and paste the video URL to a paragraph block, and WordPress will automatically convert it into a video embed block.
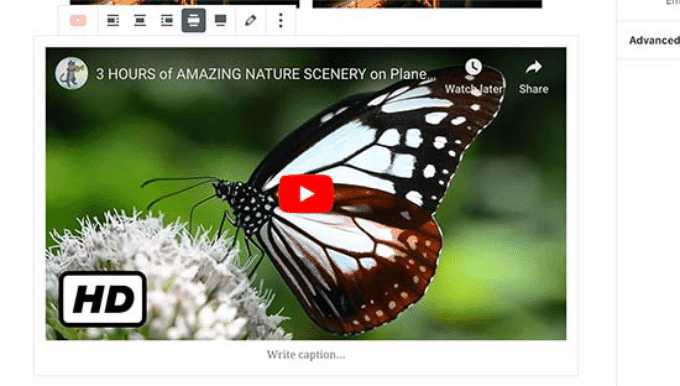
Uploading videos directly to your website is not recommended because it will slow down the loading of pages and even crash WordPress hosting servers.
Instead of uploading videos to your own website, we recommend using services like YouTube and Vimeo. This way you can embed them in WordPress posts so they’re always available for viewing on the go!
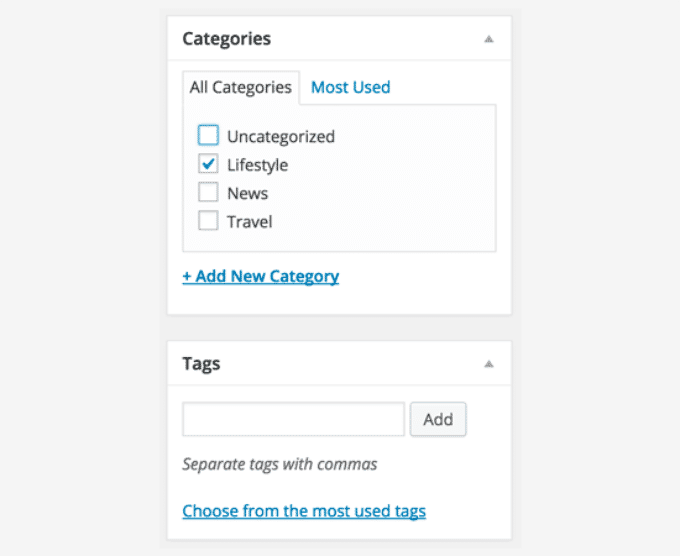
Adding Categories and Tags
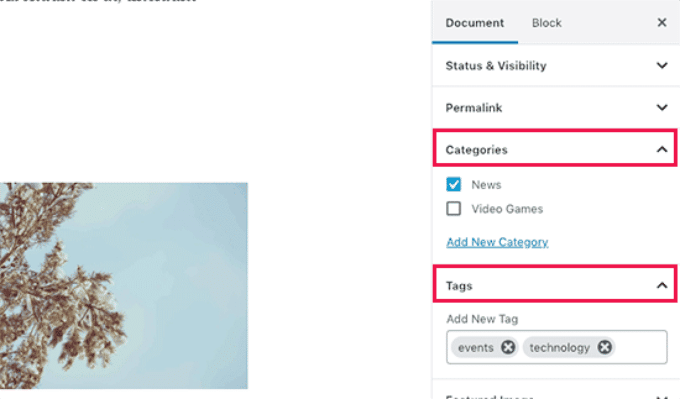
WordPress provides you with the option to sort your posts into categories and tags. These taxonomies help organize content into sections, which are topics within a particular subject matter or category of interest.
They also help with SEO and make it easier for your users to find the content they are looking for.
The categories and tags meta boxes are located in the right-hand column, under the Document settings.
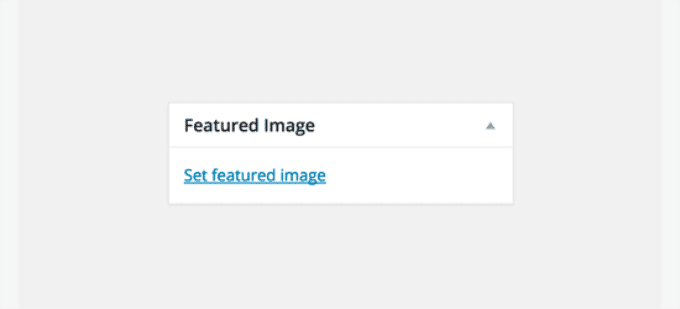
Adding Featured Image
The featured image (post thumbnail) is the main article picture that represents your content. It’s prominently displayed on single posts, blog archive pages and even in front of news articles to show off their most popular story!
Almost all WordPress themes support the featured image functionality. You will find the option to add a featured image to your post in the right column under the Document settings.
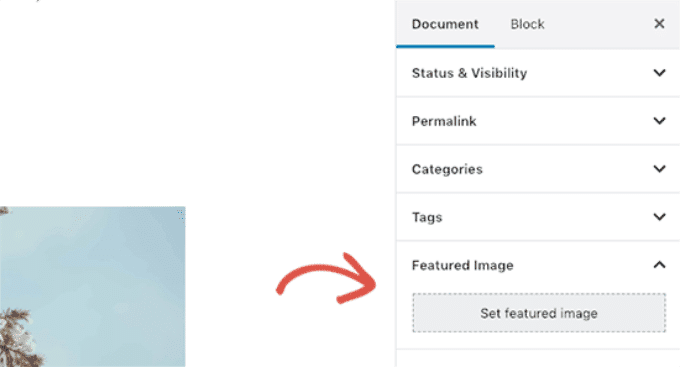
Simply click on the ‘Set featured image’ button and then select or upload the image you want to be used as the featured image.
It’s important not to confuse featured images with cover images.
The cover image is what shows up on the front of your blog, magazine or book. A featured image can be used as an eye-catching complement to a larger piece and will often appear in newsletters with smaller blogs.
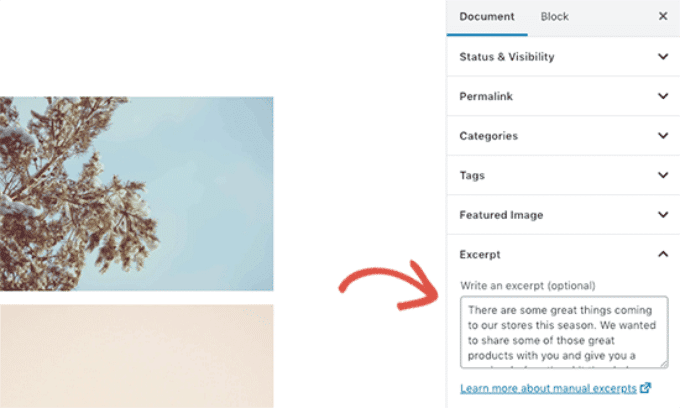
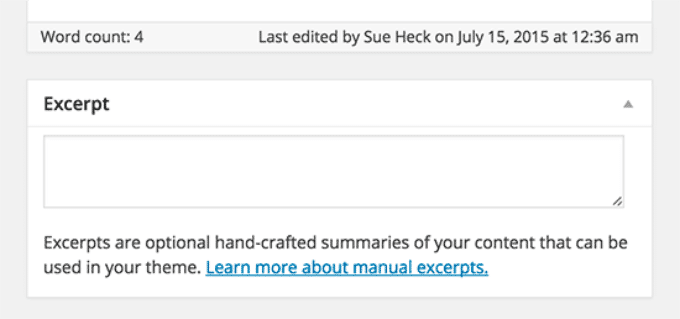
Adding Excerpts (Article Summary)
The excerpt is a short summary of the whole post. WordPress themes can automatically generate it from just a few lines in your article or blog entry, which means that you don’t need to worry about how long each line should be for making this part work properly!
However, this automatic excerpt may not always be meaningful or catchy. In that case, you may want to manually add an excerpt.
You can do so by adding it to the excerpt box located under the document settings column on the right.
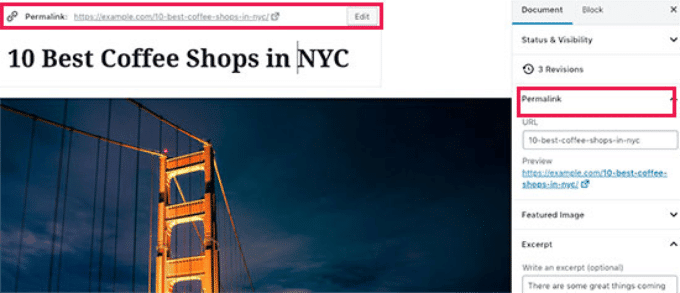
Changing Post URL Slug or Permalink
WordPress makes it easy to create SEO-friendly URLs by automatically using your blog post’s title as the permalink.
Permalinks are the permanent URLs of your individual blog post or page on your WordPress site. Permalinks are also referred to as pretty links. By default, WordPress URLs use the query string format.
However, some users may want to change it to be more SEO and user-friendly. There are two ways to do that.
You can click on the post title, and you’ll notice the option to change the permalink above the title field. Alternatively, you can change it from the Permalink tab under the document settings column.
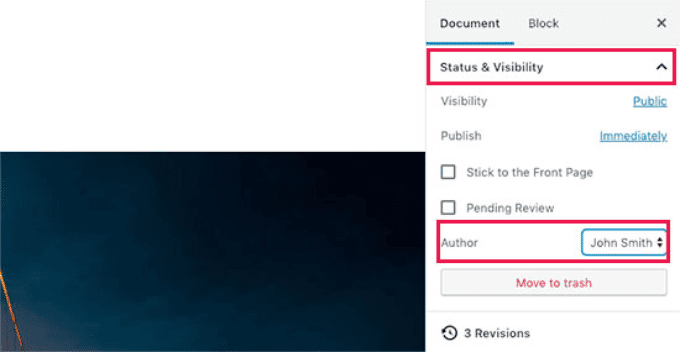
Changing Author
If you have a WordPress site with more than one author, then it is possible to change the post’s Author and assign them different authors on your website.
You will find the option to change author under the ‘Status and Visibility’ tab in the right column.
Turn Comments On / Off
WordPress has an inbuilt commenting system that allows users to leave comments on your post. If you want to turn off comments for an individual post, go into the Discussion tab and select “Disallow Comments.”
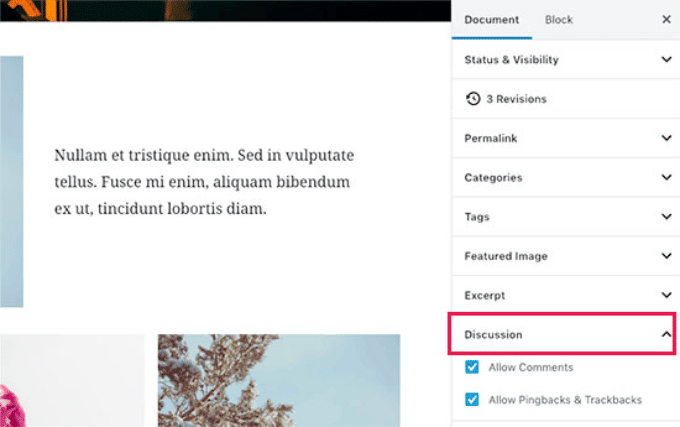
You’ll also see the option to allow pingbacks and trackbacks. These allow you and other blogs to notify each other when they link to an article.
It’s important to remember that the Pingback and Trackbacks features can be used for both legitimate purposes as well as malicious ones. For this reason, it is best if you completely disable them when not using their functionality so they don’t turn into a security risk or pop up without your permission on pages where these functions would otherwise go unnoticed.
Options Added by WordPress Plugins
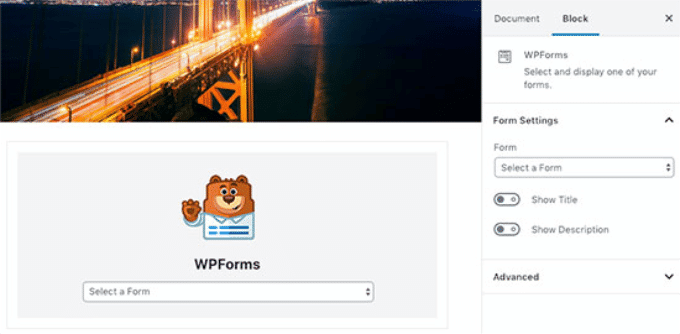
WordPress has a number of different plugins options that you can add to your post edit screen. Some plugins will offer them as blocks and others in meta boxes, so be sure to check which one works best for what kind of situation before adding it!
With WPForms, you can add a contact form to your posts and pages. This is the best WordPress plugin for adding this important feature!
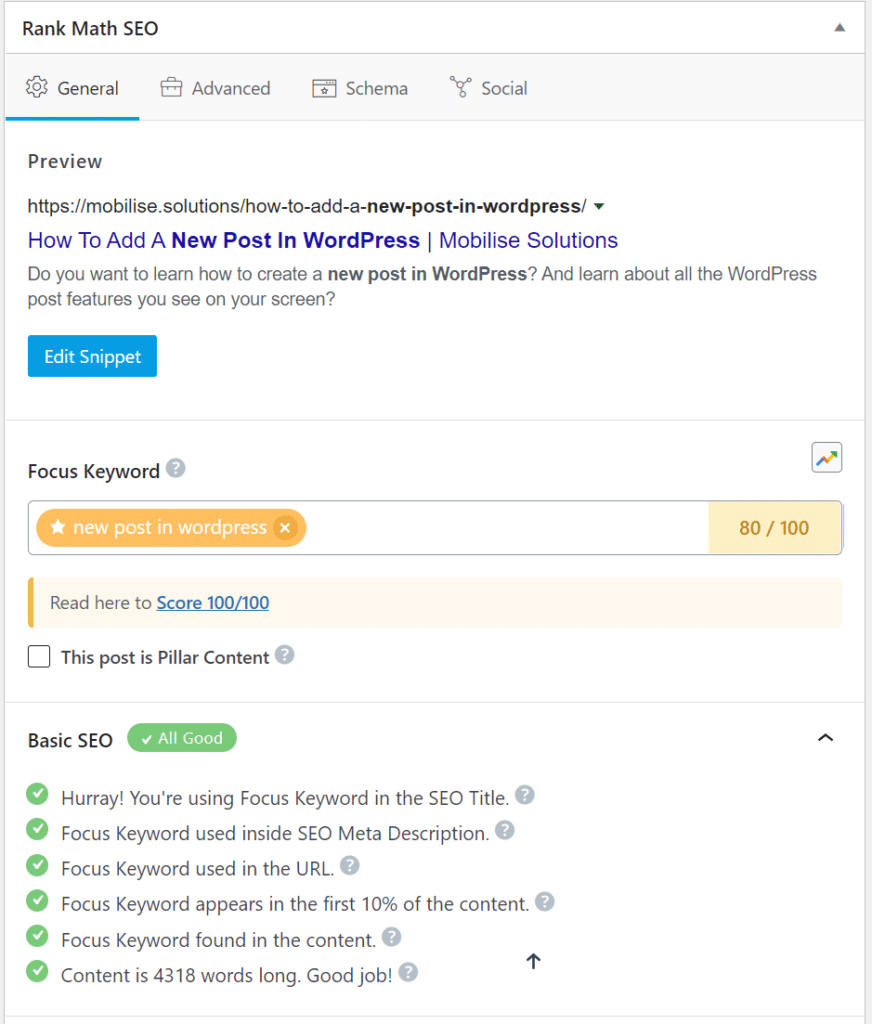
With so many different options for SEO, it can be hard to keep track of all the settings. That’s where Rankmath comes in! They’ve included a meta box under the editor and another one on the top toolbar.
Publishing Options
WordPress is a powerful blogging platform that has two different columns on the default edit screen. The left-hand side of this layout contains all your content, while right beneath it are options for publishing posts including the date and time they’ll go live in addition to any tags applied beforehand!
Let’s take a look at publishing options in the right column.
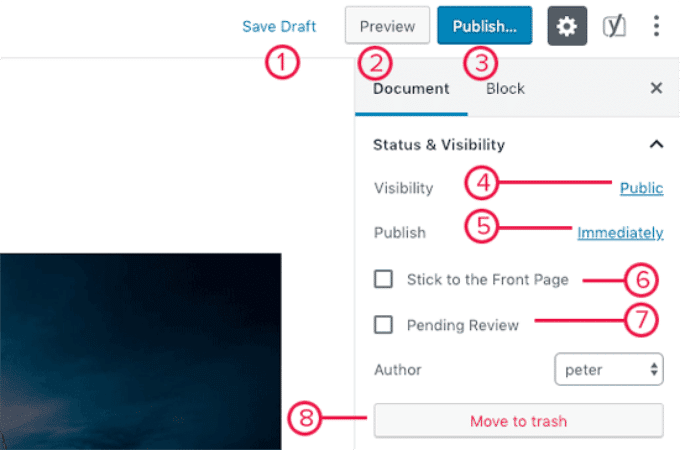
1. With Save Draft Link, you can quickly save any changes to your WordPress post. The editor will also automatically sync up with whatever has been written in the browser so there’s no need for extra steps like copy-pasting text or changing things manually!
2. Clicking the preview button on your screen will bring up an instant live view of what you’ve just written.
A quick way to check it before publishing!
3. Once you are done editing your post, you can click on the Publish button to make your post go live.
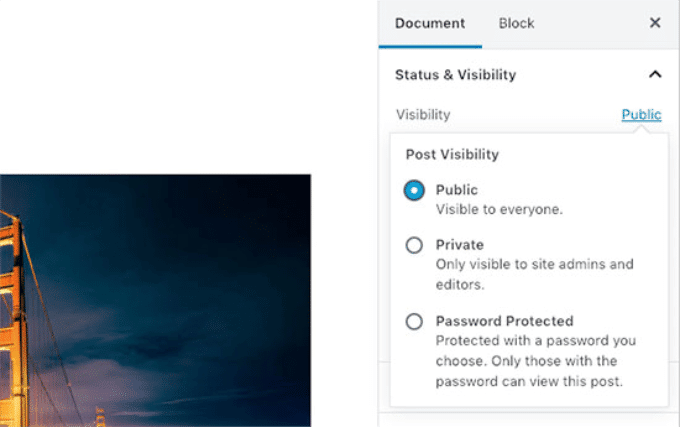
4. WordPress gives you a few options to control the visibility of your post. The default option is ‘Public’ but clicking on it will show you options to make a post private or password protected.
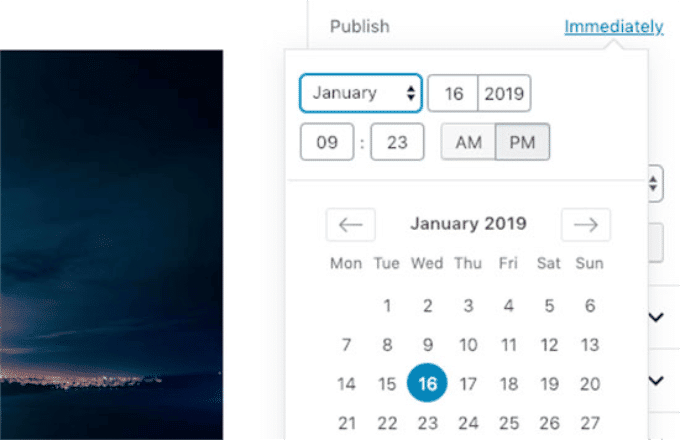
5. WordPress has a blog publishing option where you can choose when your posts will be made public. The default is immediately, but if that’s not what you want it set at then there are other options for scheduling or delaying the release of content until later in time!
6. Checking the box next to ‘Stick to front page’ will make a post sticky or featured. This makes the specific post appear on top of other posts.
7. The pending review option allows you to set a custom status for your posts that are waiting in the wings. This is helpful on multi-author blogs where contributors can just save content and not publish it right away.
8. To delete a post, click on the “Move to trash” button. Posts will be sent to an automatically generated folder in your WordPress admin area and stay there until they are deleted permanently after 30 days if no other action is taken by you.
Edit Screen Options
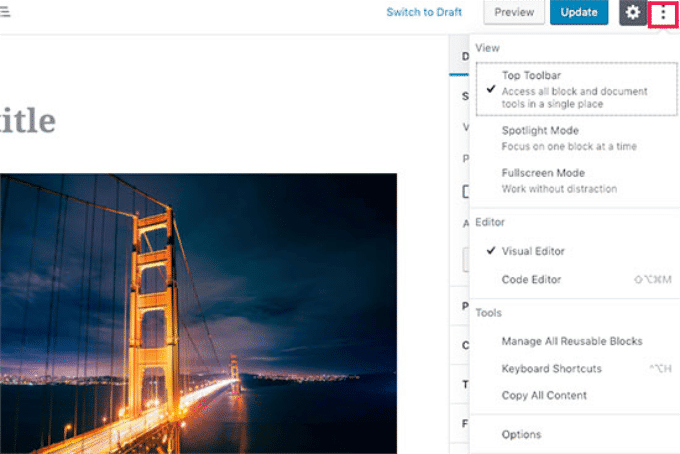
WordPress provides you with the option of hiding panels from your edit screen by clicking on a three-dot menu at the top right corner and then choosing “Options”.
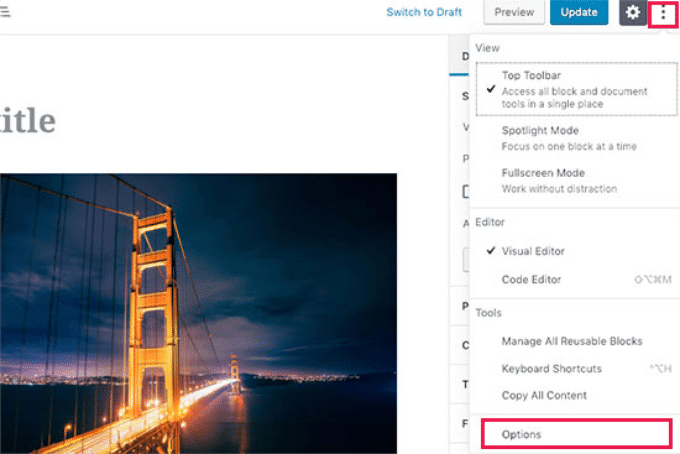
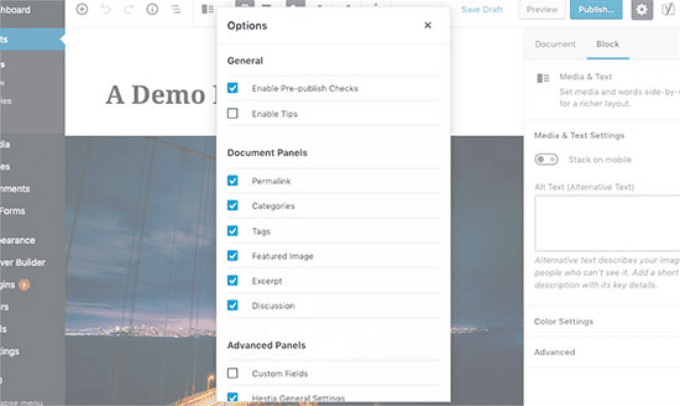
This will bring up a popup where you can check or uncheck the panels.
Other Post Edit Screen Options
A post edit screen is a place where you can make all your changes and additions before publishing. There are many options available, including changing fonts or colours of text on the page as well creating logos for brands new posts with just one click!
Let’s explore them.
The three-dot menu icon at the top right corner of your screen will give you access to a variety of options depending on what type and/or style block toolbars are enabled. You can move them up or down, switch between visual editor mode (which makes it easier for beginners) versus codeStyleBuilder if needed; manage reusable blocks like backgrounds without having multiple instances running in tandem – plus some keyboard shortcuts too!
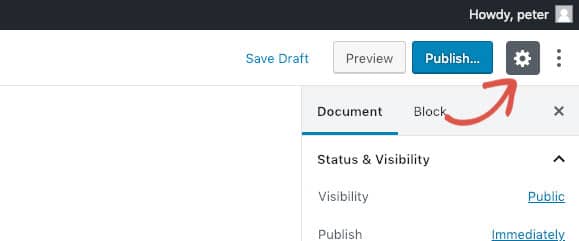
Next to it, you will see a button with the gear icon. Clicking on it will show/hide the right document and block the settings column.
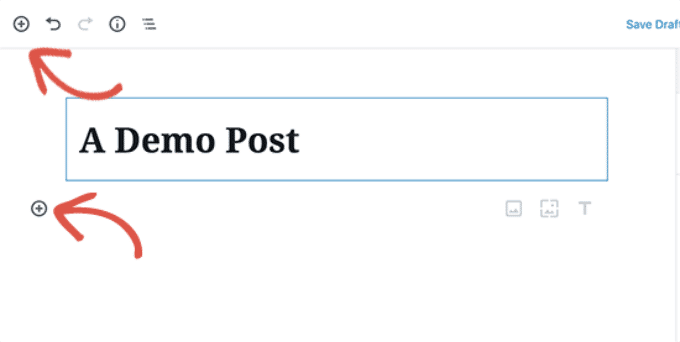
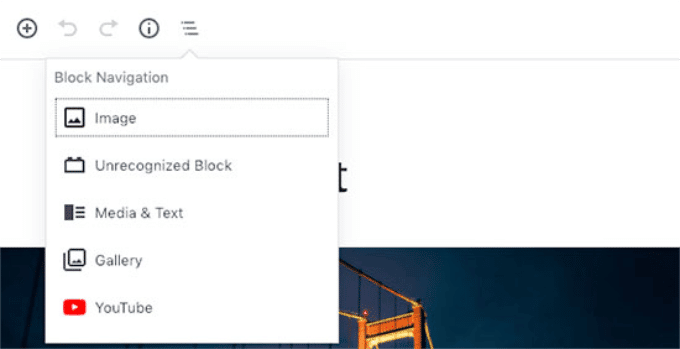
On the top-left corner of the screen, there are a few more buttons. First, from the right, the navigation button, allows you to quickly jump to a block in your post.
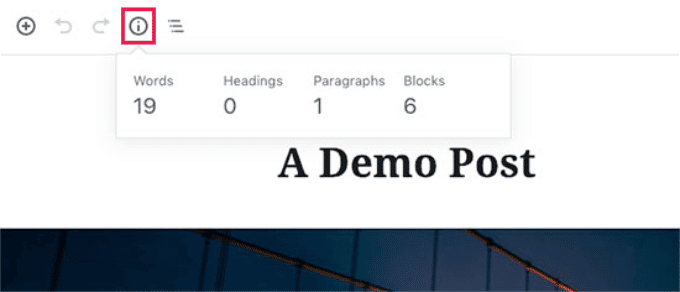
Next, The information icon is a red box with an info crib in the middle. Clicking it will show you post stats like how many words there are, paragraphs that have been written about your posts and headings for categories or tags associated with content on this page!
After that, you have Undo and Redo buttons which allow you to undo changes you made to your posts before saving or publishing them.
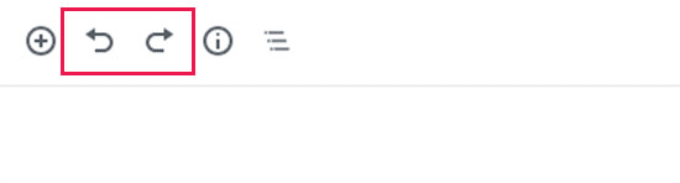
Then, the add block button which allows you to insert blocks to the post editor.
The default WordPress editor is quite powerful.
This is a great opportunity to explore the different blocks and see what tricks they have up their sleeves. Each one has its own set of options, so be sure not to miss out on all those fun possibilities!
Creating a New Post in WordPress Using The Classic Editor
This is for all you classic WordPress users out there.
The classic editor was only supported until the end of 2021, and we strongly recommend all users create a plan for switching to the new WordPress editor.
Title and Content Boxes
In the classic editor, title and content boxes are the most noticeable areas on the Add New Post screen (see the screenshot below).
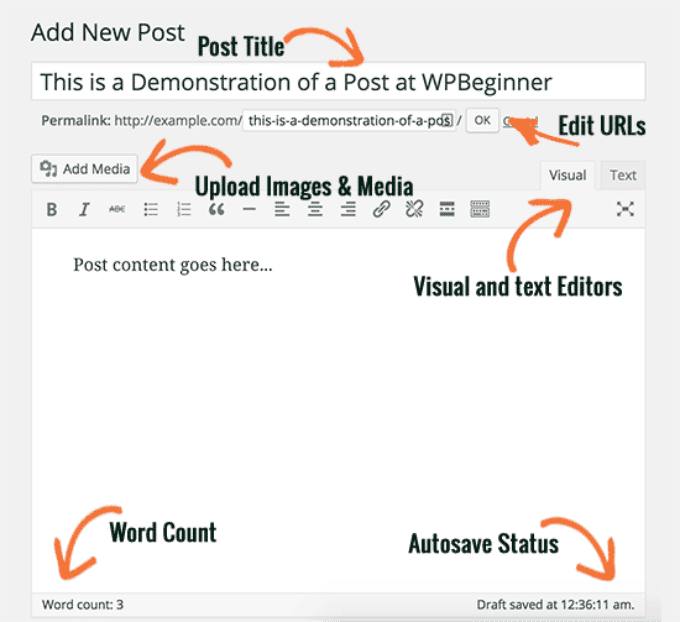
The post title is the first thing that appears on your blog page. If you are using SEO Friendly URL structure, then WordPress will automatically generate a unique link for these posts based on its content with just one click! You can edit these links by clicking “edit” next to them in order to make sure they point exactly where to want them too.”
The content area is where you can type your post. You have access to all of the formatting options from a toolbar or by using one of many keyboard shortcuts that will help speed up the writing process even more!
WordPress provides you with word count in the footer area of your content editor. This can be especially useful if you are writing guest posts or articles that need to meet a certain number of words per page, and it will allow readers to know how many more pages they have left before reaching their desired destination!
As you write, WordPress will automatically save a draft of your post. This autosave is stored in your WordPress database temporarily.
WordPress saves your draft for you, so it’s a good idea to save often. If there is ever any problem with an internet connection or hardware failure while writing in WordPress and editing already saved content – all of the work will be lost!
The post editor shows your current draft and autosave status in the footer next to the word count.
Add Images and Media
Between the title and content fields, there is a large Add Media button. You will need to click on it when you want to upload an image or any other media to your WordPress post. This will launch the media uploader in a popup window.
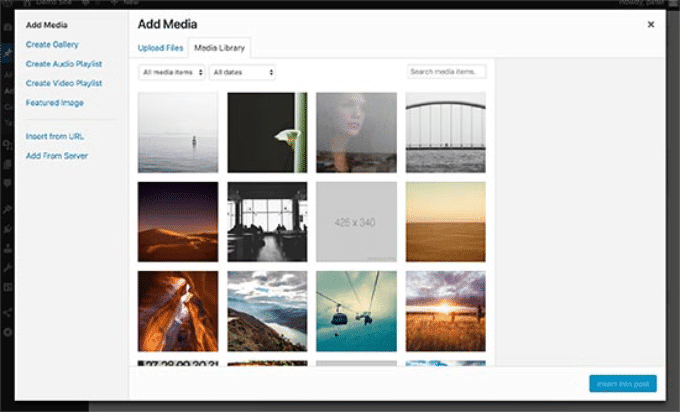
Upload any files to your WordPress site with just one click, files button, whether they be images or other media. You can create image galleries from uploaded content as well!
WordPress comes with some basic image editing tools.
Publishing Options
The WordPress post edit screen is divided into two columns. The column on your left contains the post title and content editor. On your right-hand side, you have different meta boxes to configure post settings.
Publishing options for your posts can be found in the top meta box of this column, labelled publish.
The first option is marked as “Publish” which means that it will post a draft version onto WordPress immediately upon hitting enter while still being able to make edits before publishing or republishing if needed
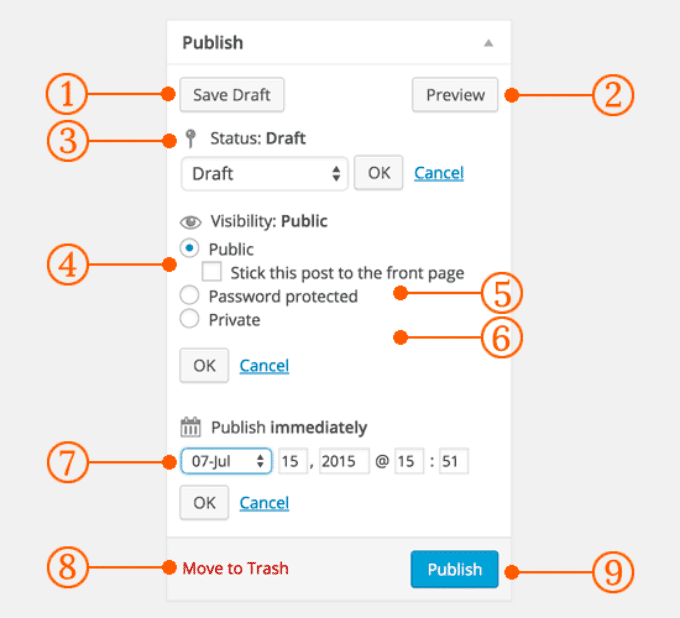
1. The Save Draft button saves a copy of the post or page you are working on. Also, WordPress auto-saves as you write them.
2. With the preview button, you’ll be able to see how your post looks and feels before publishing it. You can also go back if needed!
3. You can set the post status for your draft or published posts from within WordPress. This is done automatically unless you are using a plugin that adds custom statuses to this menu option.
4. Clicking on the Edit link next to “visibility” will expand it and let you choose if your post should be sticky or not. A stickied post in WordPress is like featured content that’s displayed at top of all other posts within their category; they’re prominently shown off as something worth reading!
5. The next option allows you to password protect a post in WordPress.
6. Private posts are only visible to those with editing privileges on your site. They can be a great way of sharing important information or discussion that does not need public exposure, but is still accessible through the use of WordPress’s Private Post feature!
7. The edit link, next to Publish, will display the date and time option, You can also use this option to schedule posts or create backdated ones in WordPress.
8. Move to trash allows you to delete a WordPress post. Deleted posts live under trash, and you can restore them if you need to for up to 30 days.
9. You can now make your WordPress post public by pressing the publish button. If you scheduled a post, then it will appear on our site at its desired date and time!
Adding Categories and Tags
With categories and tags, you can organise your posts into nice little bundles that make it easier for people searching through the site. The meta boxes usually appear in the right-hand column below publish box.
Categories and tags are an important part of organising your content in a meaningful and browsable format.
Not only does it help users easily find your content, but it also boosts your site’s SEO.
Categories are meant for the broad grouping of your posts. Think of these as general topics or the table of contents for your WordPress site Categories are hierarchical which means you can create sub-categories.
Tags are meant to describe specific details of your posts. Think of these as your site’s index words. They let you micro-categorise your content. Tags are not hierarchical.
Featured Image (Post Thumbnails)
One of the more popular features in WordPress themes is post thumbnails. This last box on your edit screen provides an easy way to add a featured image or video for each article you create, making them stand out even more!
Simply click on the set featured image link, and it will bring up the media uploader popup. You can select an image from your previous uploads or upload a new image from your computer.
Screen Options
The post edit screen has some options that are hidden by default, which makes it easier. These options are not ussaly used by beginners, you may need them later.
Simply click on the Screen Options button on the top right corner of the page. This will show a menu with checkboxes next to option names.
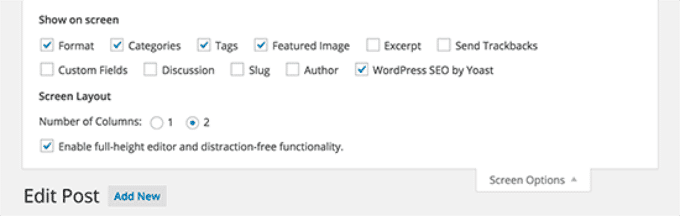
As you can see, there are some options that will already be checked. For the others just click on their checkboxes and they’ll show up on your post edit page!
Let’s take a look at some of these options and what they do.
Excerpts
Checking this box adds an additional tab below your content editor with the option of adding a summary or excerpt for posts.
Ideally, you should summarise or excerpt your posts for display on the site’s front page and archives. The full content can only appear as a single page post.
By using excerpts, we significantly improve the user experience. Users can load and browse through our category, tags, date, and other archive pages quickly and easily.
If your articles are short and do not contain a lot of images, then you can get away with displaying full posts on your archive pages. However, in most cases, we always recommend using summary (excerpts) for your archive pages.
Send Trackbacks
Send Trackbacks option allows you to notify other blog owners that you have linked to their content.
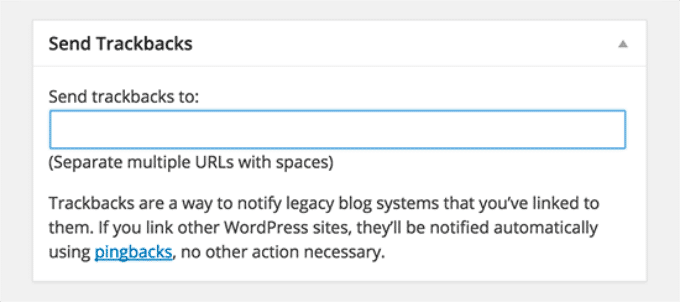
If the other blog owner is running WordPress, then you don’t need to send them trackbacks. Your WordPress site will automatically send them a ping when you publish the post.
With the trackback feature being so abused by spammers, many site owners have simply disabled it.
Custom Fields
Custom fields are an easy way to add more personality and detail to your posts. With this plugin, you can quickly create custom user interfaces for any type of input!

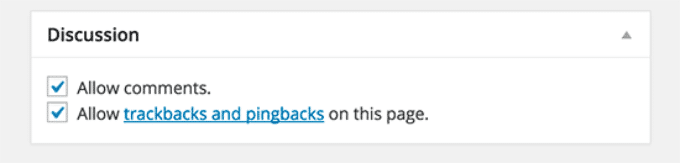
Discussion
Another way to engage your audience is through comments. There’s no need for you to have them on every post or page, though!
The discussion option displays a meta box below the post editor to turn on/off comments and pingbacks for your post.
Most users want to turn off comments on pages, so you can do this by editing each individual web page.
To do that, go to Settings » Discussion from the left sidebar of your WordPress admin panel.
On this page, you need to uncheck the option that says “Allow people to post comments on new articles” and then click on the Save Changes button to store your settings.
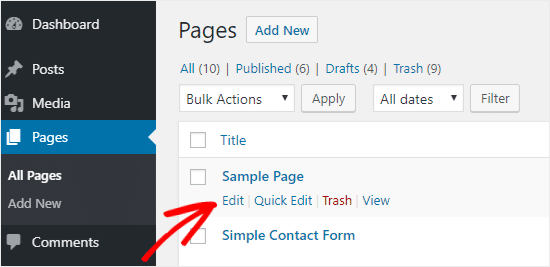
Disable Comments on a Specific Page or Post
However, WordPress gives you the freedom to enable or disable comments on individual pages and posts.
Simply head over to Pages » All Pages from the left sidebar. On the next page, you need to hover your mouse cursor over the title of a page that you want to enable or disable comments and click the Edit link.
Once your WordPress site gets some reputation, you will start getting an increase in comment spam. Instead of turning off comments, let’s take control.
If you are not monitoring your website and these comments get published, then your actual users and search engines will be able to see them. And this affects your website’s reputation.
Let’s first make sure that comments can’t be published on your website without your approval. This step will ensure that comments don’t bypass any filters, and it will also give you full control over which comments appear on your website.
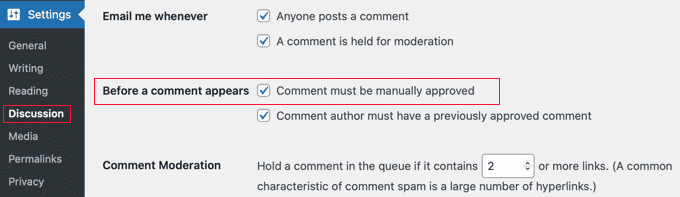
Head over to the Settings » Discussion page of your WordPress admin area. Next, scroll down to the ‘Before a comment appears’ section and check the box next to ‘Comment must be manually approved.
Don’t forget to click the ‘Save Changes’ button at the bottom of the page.
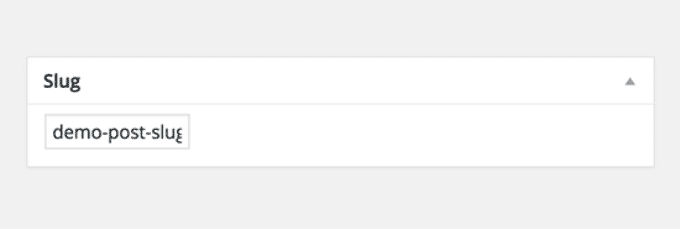
Slug
A slug is a cleaner title that can be used in URLs.
http://example.com/2015/07/this-is-post-slug
The WordPress post slug is automatically generated and displayed as the URL just below your title. You can edit this by clicking on “edit” below the post title.
You can also enable the slug option from the Screen Options and edit your post slug there.
The slug is the part of a web page’s address that appears after its domain name.
A simple WordPress slug example would be if you visited a blog post at www.example.com/blog-post, then “www.example.com” is the domain name, and “blog-post” is the post slug.
When you publish a new post on your blog, it will have the same title and slug as what is listed in bold above. So for example, if I started an online journal called “My First Blog Post” then my default published items would be titled ‘My first blogging experience’ with slugs like this: my first-blogging–experience.
You can also change the slug before you publish or even customise it to something more fitting after publishing a page.
Why customise your post slug? Customising your site’s SEO rankings and creating a better user experience for visitors is important. Slug customisation can help improve the way people find you on search engines by identifying content more efficiently, which means that they will be able to get what they are looking for with less effort!
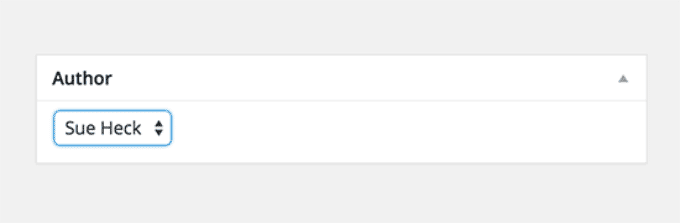
Author
WordPress will automatically assign you as the author when you create a post.
If you want to show another user as the author of a post, then enable that checkbox from your WordPress site’s edit page.
Bonus Tips for Creating Better Blog Posts
WordPress is a great platform for bloggers because it comes pre-packaged with all sorts of tools that will help you create new content.
Below are some more tips on how you can have a better blog.
This is the most important tip we offer to everyone who’s just starting out. Make sure you publish a blog post regularly, even if it’s not on your usual schedule! You can use an editorial calendar and then stick with that for consistency in content across all platforms of social media – this will help grow readership over time.
We recommend starting with 1 – 2 posts a week and then gradually increasing your pace.
New bloggers often struggle with finding post ideas for their blog, but it doesn’t have to be that way!
The first step is analysis. When you know what type of content will work best on your site and why- then writing becomes easier because there’s something specific in mind instead of just “something”.
You’ll also need to learn how to promote your posts and keep track of things. Our team has picked some of the best marketing tools that will help you grow your blog.
- Webceo, use it to track your backlinks, search rankings, competitor backlinks, paid advertising keywords, and more.
- Canva, Creates beautiful images for your blog.
- Rankmath, WordPress SEO made easy.
- Grammmarly, Online grammer checker tool.
- Shared Counts, easily add social media sharing button to your blog.
Lastly, you can make your website rank higher for certain keywords by using Rankmath SEO services. This is where an experienced seo team like ours comes in handy because we know how to do it easily! We will drive organic traffic and boost blog rankings so that visitors find what they are looking for on the first page of Google results – which means more customers at once.
We hope you’ve found this article helpful, as it teaches newcomers to post like a pro.
And if you still got questions and need some help, get in touch with our team at Mobilise Solutions.

